Wednesday, May 30, 2007

Grilled Asparagus with Mexican Caesar Dressing


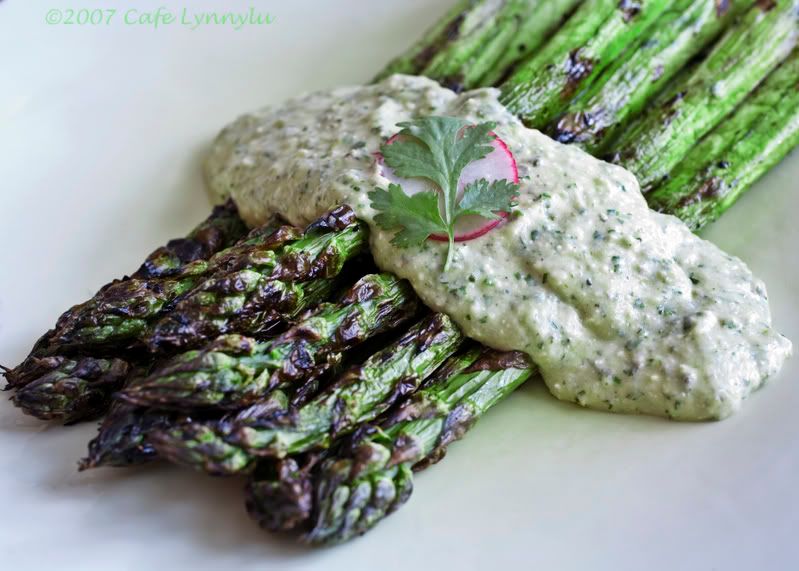
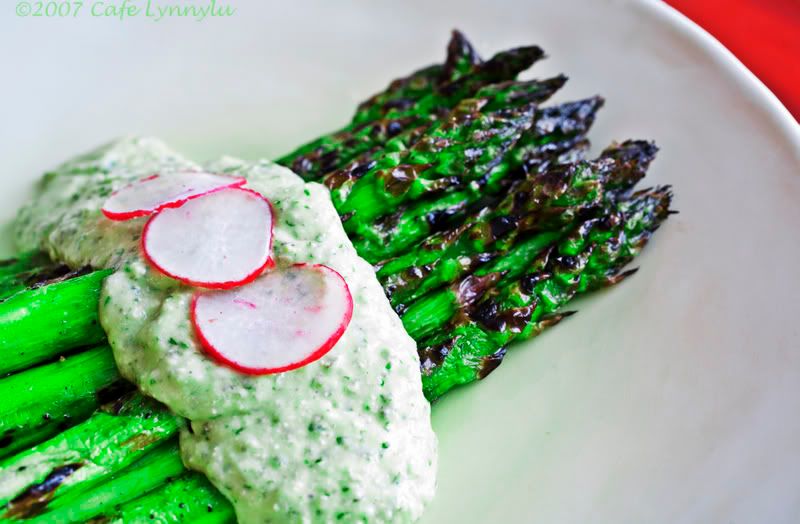
Fully intending on making this Mexican Caesar Dressing, also called Cilantro Pepita Dressing, with romaine lettuce for Baja Mexican Fish Tacos for HHDD #12 event hosted by Katie B of OtherPeoplesFood , somehow with traveling and family commitments, I missed the date. While shopping for produce, I had a brainstorm after seeing some really good looking asparagus at the market. Why not use the dressing on grilled asparagus? I had a couple of hours to spare so made the dressing a few hours earlier, then grilled the asparagus on the my ever handy Weber gas grill. Voila! I wasn't really sure how the combination would taste together, but was pleasantly surprised at the way the flavors harmonized. The rich sauce comprised of toasted pumpkin seed, green chilies, cotija cheese, lime juice, cilantro and small amounts of olive oil and mayonnaise also goes well grilled meats and seafood salads.


While searching for this dressing, I came across many versions of the Mexican Caesar Dressing, (Cilantro Pepita Dressing), but found that most had too much oil or too much mayonnaise in the ingredients. This dressing from, RecipeZaar, had the least amount of these fats.

Cilantro Pepita Dressing

For Cilantro Pepita Dressing
1 (4 ounce) can of chopped green chilies
2 tablespoons roasted pepitas (pumpkin or squash seeds)
1 garlic clove, peeled
1 dash ground black pepper
1/4 teaspoon salt
1/3 cup olive oil
1 tablespoon fresh lime juice
1 tablespoon grated Cotija cheese (you can also use Parmesan or feta cheese)
1/2 bunch fresh cilantro, stemmed
3 tablespoons mayonnaise
2 tablespoons water

Grilled Asparagus

1 lb asparagus, peeled and trimmed
3 tablespoons olive oil
Salt and freshly ground pepper to taste

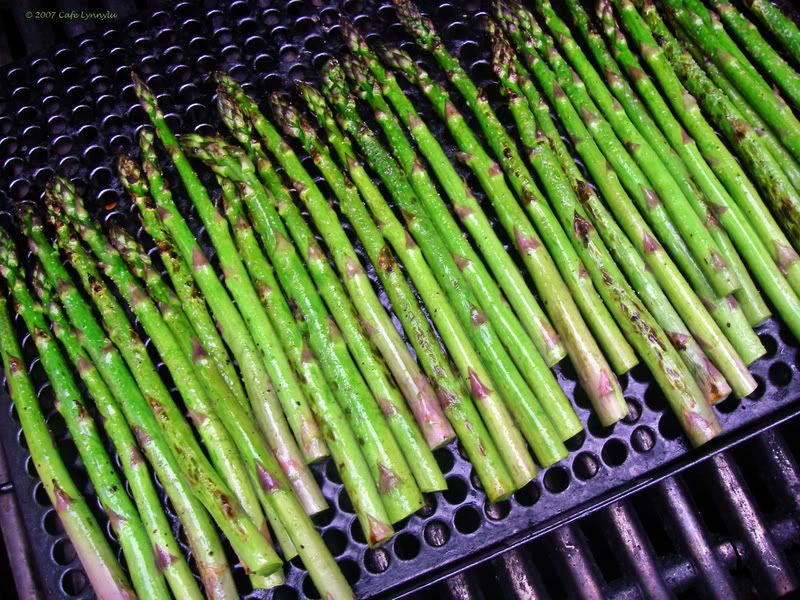
Place asparagus in shallow pan, add oil, salt and pepper. Roll asparagus around until fully coated with the oil mixture. Preheat gas grill on high for 10 minutes. Turn off one burner and place asparagus on the that side. Grill for 5 minutes, constantly rolling asparagus around to keep from charring.

When choosing asparagus, look for firm heads and firm, deep green stalks. If stalks are dried out on the ends, chances are the asparagus stalks are old. Place asparagus in water to cover bottom of stalks until you can use them, but within a day of buying.

To serve, place asparagus on a platter and drizzle dressing over. Serves 4.


Facts About Asparagus:

Asparagus is a member of the lily family and grows from a crown planted in a trench about six inches deep. When planted under ideal conditions, asparagus can grown ten inches in a 24 hour period. An asparagus plant is usually not harvested for three years from the first planting. Each plant will send up 6-7 spears during the harvest season. Asparagus plants when cared for will continue to produce for about 15 years.

Asparagus is high in folic acid and is a good source of fiber, potassium, vitamins B6, A and C. Asparagus has no fat, no cholesterol and low in sodium. The larger the spears, the better the quality.


Tuesday, May 22, 2007

Herbal Flavors-Part 1: Lemon Balm Honey


In this summer months series on flavoring food with herbs, I will begin with a lemon balm honey which is super easy to prepare and can be made with many different herbs such as lavender, thyme,rosemary, lemon verbena,cinnamon basil, scented geraniums and many others. Herbs are abundant during the summer months-perennials, such as lemon balm and chives, having slept through the winter and coming into abundance now that the warm weather is here and annuals,like the many basils and cilantro,ready for the heat of the season to thrive.

Honey has been used as a sweetener for thousands of years long before sugar was available. Honeys can have many different flavors dependent upon which flowers bees have visited while gathering nectar.Single flavor honeys are more difficult to produce, hence are more expensive. However, you can create a very good single flavor honey in your own kitchen with a good basic honey and a few chosen herbs.


Lemon balm (Melissa Officinalis) is a hardy perennial bush which grows to about 24 inches with serrated, lemon-flavored leaves and is one of the most popular tea herbs. It is excellent in salads, fruit dishes, chicken, fish, tea and summer beverages. Lemon balm marries well with other herbs such as chervil, chives, dill, mint, parsley, fennel and shallots, but use very carefully with garlic.

One of the easiest and most reliable kitchen herbs, lemon balm is a vigorous plant which tolerates both sunny and partial shade conditions. When planted in late April, the plant will have 6-inch stems by mid-June and by the end of the growing season, will have a height of about 18 inches. Lemon balm dies down in late fall, but reappears the following spring, just after the chives appear. I prefer to buy plants bypassing the seed process which can be difficult as the seeds are so minute.

Lemon Balm Honey

1 cup honey
1 sprig or several leaves of lemon balm

Heat the honey gently over a low heat. Place the herbs in a clean, sterilized jar and pour the warm honey over them. Seal and allow to mellow for at least a week before using. After a week, you can strain out the lemon balm and reseal the jar.


Lemon Balm honey is very tasty over grilled pineapple and vanilla ice cream as shown in the photo below.


In Part 2 of Herbal Flavors, I will feature an herb vinegar. Stay tuned.


Tuesday, May 8, 2007

Chicken Tagine with Pine Nut Couscous


Tagines can be purchased here

I love Moroccan food! Spices such as ginger, cumin, tumeric, paprika and garlic made into pastes, combined with dried fruits, preserved lemons, some sort of meat or vegetable and made into a stew to serve over couscous really get my taste buds going. These stews are often cooked and served in a Tagine, an earthenware pot with a conical lid. Cooking tagines tend to be terracotta and can be used on top of the stove or in the oven while serving tagines are more decorative with beautiful colors and patterns. The base of the tagine is the heavier part made to withstand heat and constant whereas the conical top seals the vessel which acts as a chimney to keep moisture and steam inside the tagine.

My sister, of Crossing Stitches, bought me a beautiful tagine for my birthday just recently, so I began surfing the web and my cookbooks for a recipe, but I was intimidated by all of the ingredients, especially preserved lemons which are hard to find in my area. The March, 2007 Sunset magazine had an article on chicken thighs and in the article was a recipe for Chicken Tagine with Pine Nut Couscous which could be made in 1 1/2 hours total prep and cooking time and had ingredients that were easy to find in the supermarket. Instead of using preserved lemons, lemon zest made a great substitute. The recipe sounded perfect!


Ingredients

2 tablespoons olive oil
6 bone-in chicken thighs (with skin)
1 medium onion, thinly sliced (about 2 cups)
4 large garlic cloves, minced
1 tablespoon minced fresh ginger
1 teaspoon ground cinnamon
1 teaspoon ground turmeric
1 teaspoon ground coriander
1/4 teaspoon freshly ground black pepper
2 cardamom pods, lightly crushed
2 small dried red chiles, such as arbol ( I substituted 1/2 crushed red chiles)
1 teaspoon salt
15 dried apricots, halved
15 pitted prunes, halved
4 cups reduced-sodium chicken broth
5 fresh flat-leaf parsley sprigs plus 1/4 cup minced fresh parsley leaves
1 1/2 cups couscous
1/4 cup lightly toasted pine nuts
1 teaspoon grated fresh lemon zest

1. Heat oil in a 6- to 8-qt. heavy-bottomed pot over medium-high heat. Add half the chicken, skin side down, and cook until golden brown, 5 to 7 minutes. Turn over and cook 3 minutes more. Transfer to a plate; repeat with remaining chicken and set aside.

2. Drain all but 2 tbsp. oil from pot and reduce heat to medium. Add onion and sauté until golden, 5 to 7 minutes. Add garlic and ginger and cook, stirring constantly, for 3 minutes. Add cinnamon, turmeric, coriander, black pepper, cardamom pods, chiles, and salt and stir to combine. Return chicken to pot and add apricots, prunes, 2 cups chicken broth, and parsley sprigs. Bring mixture to a boil, then reduce heat to medium-low. Cover and simmer 40 minutes. Take pot off heat and remove parsley sprigs and chiles. Remove skin from chicken.

3. In a covered medium saucepan, bring remaining 2 cups chicken broth to a boil. Turn off heat, stir in couscous, cover, and let sit 5 minutes. Uncover pan and fluff couscous with a fork. Stir in 2 tbsp. minced parsley, pine nuts, and lemon zest and toss to combine. Mound couscous on a platter. Top with chicken thighs and pour sauce over the chicken. Sprinkle with remaining 2 tbsp. parsley.

Makes 4-6 servings

Thursday, May 3, 2007

A Taste of Yellow-Lemon Tea Bread


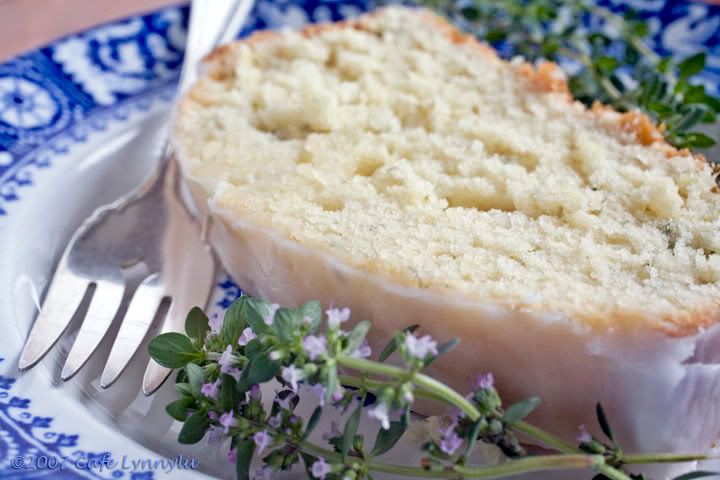
The lemon balm and lemon thyme in my herb garden are putting out new growth now that spring is here and the lemon thyme is beginning to bloom with tiny white flower clusters. A perfect time to make this lemon tea bread recipe from Emelie Tolley and Chris Mead's book "Herb, Gardens, Decorations, and Recipes", one of my very favorite herb books which has gorgeous photos by Chris Mead. It is also a perfect time to write this post for the Livestrong Day blog event hosted by Barbara of winosandfoodies whose personal life has been affected by cancer. The Livestrong event is the Lance Armstrong Foundation's (LAF) initiative to promote awareness of cancer which has touched everyone in some way whether a friend or family member or personally. I lost a dear friend a year ago who had battled with cancer for several years and was one of the most elegant and lovely persons that I have ever known. I miss her terribly.

Please visit Barbara's site winoandfoodies for more information about Livestrong Day.


Lemon Tea Bread

Makes 1 loaf

3/4 cup milk
1 tablespoon finely chopped lemon balm
1 tablespoon finely chopped lemon thyme
2 cups all-purpose flour
1 1/2 teaspoons baking powder
6 tablespoons butter, at room temperature
1 cup sugar
2 eggs, beaten
1 tablespoon grated lemon zest

Butter a 9x5x3-inch pan. Preheat the oven to 325 degrees F. Heat the milk with the chopped herbs and let steep until cool.

Mix the flour, baking powder, and salt together in a bowl. In another bowl, cream the butter and gradually beat in the sugar. Continue beating until light and fluffy. Beat in the eggs, one at a time. Beat in the lemon zest. Add the flour mixture alternately with the herbed milk. Mix until batter is just blended.

Put the batter into the prepared pan. Bake for about 50 minutes, or until a toothpick inserted in the center comes out clean and dry. Remove from the pan onto a wire rack that is set over a sheet of waxed paper. Pour Lemon Glaze over the still-hot bread. Decorate with a few sprigs of lemon thyme.

Lemon Glaze

Juice of 2 lemons
Confectioners' sugar

Put the lemon juice in a bowl and add the sugar, stirring until a thick but still pourable paste forms. Pour the glaze over the hot bread.

Sunday, April 22, 2007

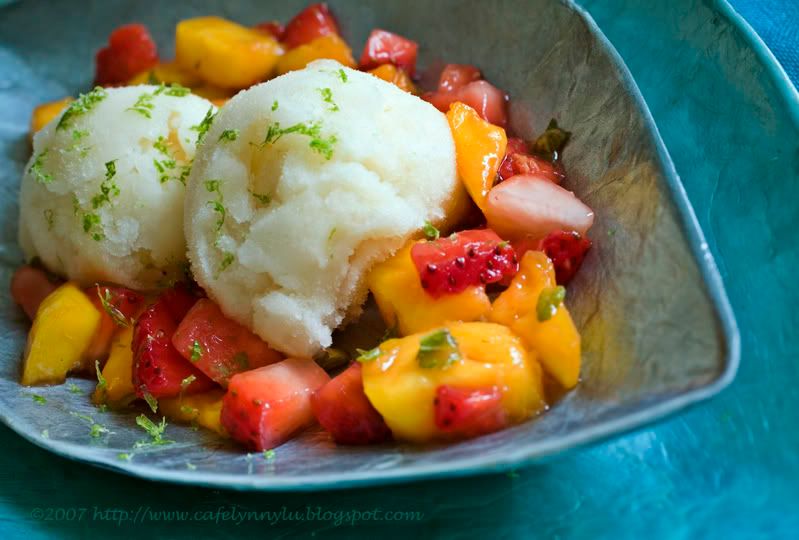
Exotic Fruit-Pepino Melon Sorbet with Mango Strawberry Fruit Salsa


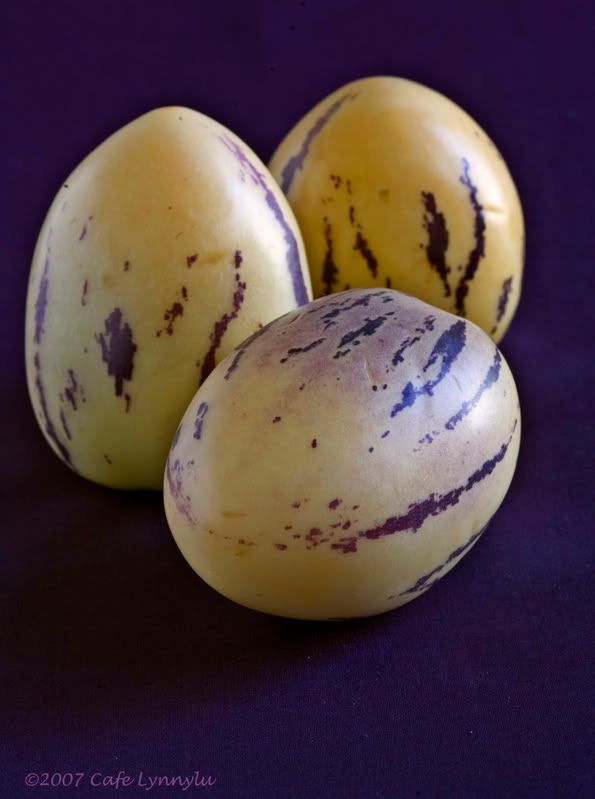
A luscious ambrosial fruit, pepino melons have a golden yellow flesh and the outer peel is golden yellow to apricot-colored when perfectly ripe. Pepinos are native to the South American Andes region, but most pepinos come from New Zealand. The photo below showing the beautiful purple stripes is a good example of a ripe pepino. When buying pepinos, choose those which are fragrant and free of bruises.


Pepino Melon Sorbet

3 pepino melons
1/4 cup bottled pineapple juice ( I used the Looza brand)
1/2 cup sugar


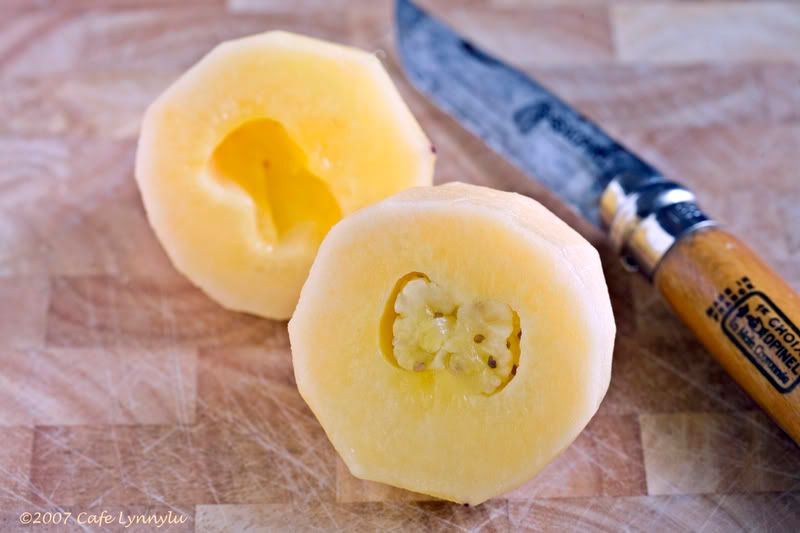
Trim the peeling from the pepino, cut in half and remove seeds with a spoon. Be sure to work over a bowl to catch precious juices which may drip out in the process of chopping the fruit. When roughly chopped, place in a blender or food processor with the pineapple juice and puree for 30 seconds. Strain fruit through a fine sieve. Process in an ice cream maker according to manufacturer's instructions. Store in freezer. Makes about a pint.

Strawberry Mango Fruit Salsa

1 pint ripe strawberries, stemmed and diced
1 ripe mango, peeled, stoned and diced
1 tablespoon honey
1 tablespoon lime juice
1 tablespoon chopped fresh mint leaves
Lime Zest for garnish

Serves about four spooned over pepino melon sorbet.

Thursday, April 12, 2007

Yorkie Puppy


Just wanted everyone to know that this little guy has slowed my blogging down to a snail's pace. Meet Razzle Dazzle-my new little buddy-born on Valentine's Day and who in a very short two weeks has worked his way into my family's hearts. He's a writhing mass of energy charging at our feet constantly, his sharp teeth gnawing at our shoes and shaking his toys with head movements that would surely break our necks if we even dare try.

For the past two weeks, the housework has gone to hell, the cooking has slowed down, the photos aren't as frequent on Flickr and I am hoping I will survive the puppy training without having to completely redecorate my house, but I am having a ton of fun with this little guy!

Will post another recipe and photo very soon!!

Saturday, April 7, 2007

Sopaipillas


Nearly every cuisine has a fried bread either leavened with yeast or baking powder. In the Southwest and Mexico, it is the sopaipilla, reminiscent of the Native America Fry Bread which is a staple among the Navajo Indians and other American Indians of the Southwestern region of the United States.

Sopaipillas are golden fried puffs of bread traditionally served at the dinner table in the Southwest, Mexico and South America, but are equally delicious drizzled with honey or stuffed with meat and beans.

I am a great fan of Jaqueline Higuera McMahon, writer of the "South to North" column in the San Franciso Chronicle and author of six books related to chiles and Southwestern food. An eighth generation Californian, McMahon's first book is a collection of early California recipes and stories of her great great great grandfather, Jose Loreto Higuera and the family's Rancho Lost Tularcitos.

My sopaipilla recipe comes from McMahon's "Red and Green Chile Book, A Cook's Guide with Savory Recipes published in 1987, but no longer in print. McMahan's recipe has step by step instructions for mixing by hand, but I put all the ingredients in my bread machine on the dough cycle.

Sopaipillas are my entry into this months edition ofWaiter, Theres Something in My---Bread hosted by Andrew of Spittoon Extra.


Sopaipillas

3 3/4 cups all purpose flour
1 1/2 teaspoons of salt
1 1/2 teaspoons baking powder
3 tablespoons shortening
1 teaspoon dry yeast
3 tablespoons warm water
Pinch of sugar
1 cup evaporated milk, plus 2 tablespoons
2 cups light oil, for frying

Follow your bread machine's instructions for the dough cycle, but skip the rise cycle. Take the dough from the machine,form into a ball, cover and let rest for 30 minutes. Punch dough down and divide in half. Wrap in plastic wrap so it doesn't dry out.


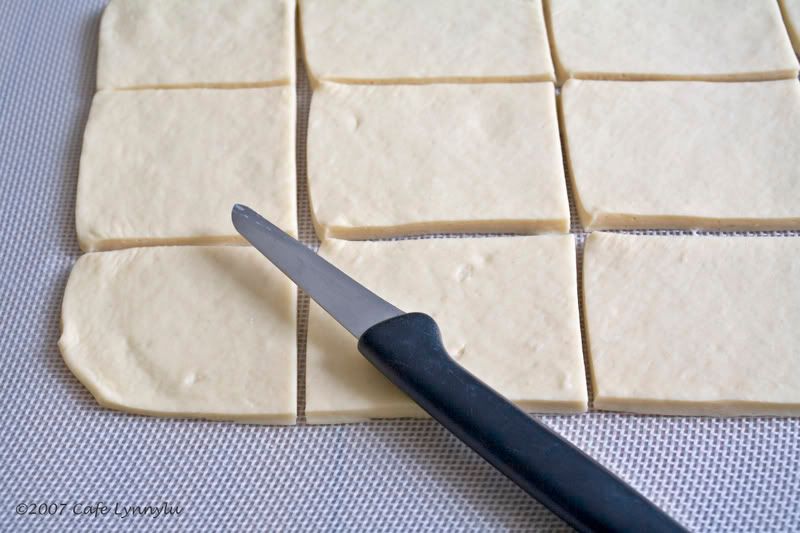
Roll out the dough in a rectangle, about 1/4 inch thickness. Fold in half and roll out again. Trim uneven edges with a sharp knife. Cut into 12 rectangles. Heat oil in a deep saucepan to 360 degrees F. Line a jelly roll pan with several layers of paper towels. Drop in one square of dough which will sink to the bottom. Hold down lightly with tongs until dough puffs up. Alternatively, you can spoon hot oil over the top continously and the sopaipilla will keep puffing. When golden brown on one side, turn the sopaipilla over to brown the other side. Lift it out and place on paper towels. Blot the top. Continue with remaining rectangles. When finished, turn off the oil while you roll remaining half of dough. Turn the oil back on as you are cutting out the rectangles. When finished frying, serve immediately plain or sprinkled with powdered sugar and a scoop of ice cream. Garnish with a strawberry or other fruits.